
Views: 0 Author: Site Editor Publish Time: 2026-05-26 Origin: Site


You press the button, and the green light glows brightly. You take a draw, but absolutely no vapor comes out. Few things frustrate vapers more than a fully charged device refusing to hit. You must figure out the root cause quickly. Is it a minor mechanical glitch? Did a clogged cartridge ruin your session? Or is the power cell completely dead and ready for the trash?
We will skip the generic advice today. You will learn systematic diagnostic methods used by hardware experts. We cover community-tested fixes like center-pin resets. You will also discover airflow compatibility checks to get your device firing again. These proven techniques prevent unnecessary hardware disposal. Let us troubleshoot your device step by step and restore your vapor production.
Isolate the Variable First: Always cross-test with a backup cartridge to confirm whether the 510 battery or the tank is the failure point.
Physical Connection is the #1 Culprit: Overtightening pushes the center pin down; a gentle reset with a paperclip often restores functionality.
Understand Device Compatibility: Top-airflow cartridges will not fire on a standard auto-draw 510 battery; they require push-button activation.
Preheat Safely: For thick concentrates, use built-in preheat functions or a hairdryer—never microwaves—and wait for visual cues (rising bubbles) before drawing.
Read the LED Signs: Blinking lights are diagnostic codes indicating short circuits, over-voltage, or dead cells, signaling when a replacement is more cost-effective than a repair.
You need a logical decision tree before replacing any components. This framework prevents you from discarding functional hardware. Hardware issues often mimic cartridge clogs. You must separate the power source from the tank.
Connect a secondary, known-working cartridge to your 510 Battery. This isolates the exact failure point immediately.
If it fires: The original cartridge has failed. It might be clogged, shorted, or incompatible. Your power source works fine.
If it fails: The power source is the root cause. You can stop troubleshooting the tank.
Identify the cartridge intake hole location. Bottom-airflow cartridges work universally across most hardware. Top-airflow cartridges lack bottom vacuum pressure. They will not trigger a Custom 510 Battery Auto Draw Thread Vape Pen. They require a manual push-button mechanism to activate the heating element. Many users mistake this airflow incompatibility for a broken device.
Pay close attention to draw resistance and flavor profiles. These sensory details reveal hidden mechanical problems.
Sensory Symptom | Implication | Action Required |
|---|---|---|
High Draw Resistance | Implies a severe cartridge clog, not a battery failure. | Clear the airway manually using a dry hit. |
Burnt Taste | Indicates coil starvation from high voltage or thick oil. | Step down the voltage to a 2.0v–3.2v baseline. |
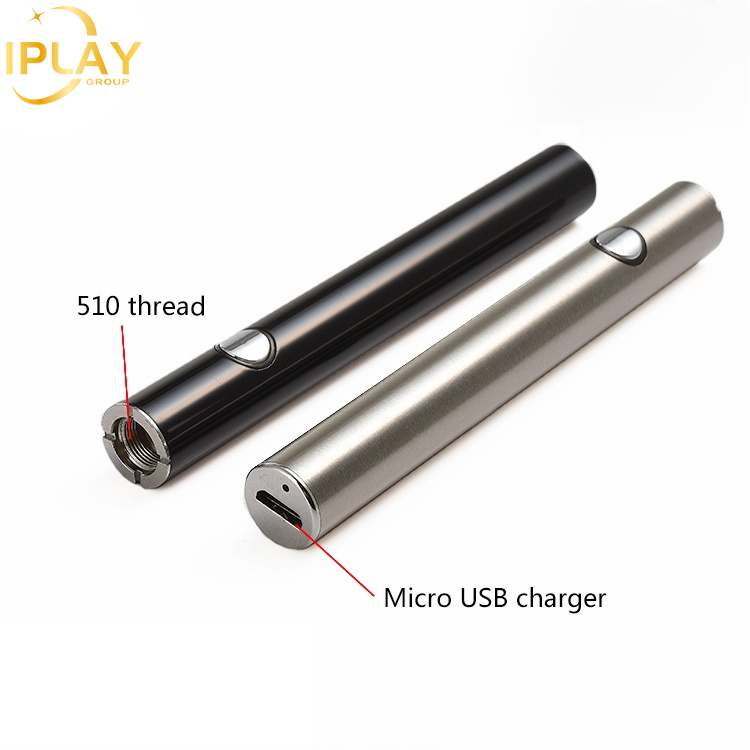
Mechanical connection failures happen frequently. We can fix them using advanced, community-verified methods. You rarely need specialized tools to solve these physical barriers.
Overtightening the cartridge causes massive electrical problems. It depresses the center connection plate downward. This physically breaks the electrical circuit between the tank and the base.
Power off the device completely.
Find a precision tool like tweezers or a small paperclip.
Gently pry the center pin upward by roughly one millimeter. Work around the edges slowly.
Be extremely careful here. Pulling too hard can sever the internal wire completely. Proceed using minimal force to avoid permanent damage to the chassis.
Sometimes the metallic threads look perfectly clean. However, clear oxidation blocks vital electrical conductivity. Sticky liquid residue also creates a microscopic barrier.
Grab a standard pencil. Rub the eraser vigorously against the bottom contact plate. Do the exact same to the base threads of your tank. This friction strips away unseen grime. Follow up using a cotton swab dipped in 99% isopropyl alcohol. Let the metal dry completely before conducting a test fire.
Modern devices feature highly sensitive internal components. Thick oil often disrupts these delicate mechanisms. You must address liquid flooding and cold temperatures properly.
Auto-draw devices react poorly to liquid leaks. Oil leaking through the center vent coats the internal pneumatic sensor. This ruins the automatic activation trigger.
You can clear the airway easily. Perform a dry hit by pulling air through the cartridge without attaching it to the base. For the base unit itself, gently tap it against your palm. This physical shock unsticks a jammed internal sensor mechanism safely.
Thick concentrates will not wick properly in cold environments. This causes auto-shutoff errors. It also burns the internal cotton coil quickly.
You should utilize a Hidden 510 Thread Battery LED Auto Draw Preheat Vape Battery if available. The built-in preheat cycle warms viscous liquids perfectly. You can also heat the tank manually. Use a hairdryer set six inches away. Alternatively, seal the tank in a bag under warm running water. Look for visual verification. You want to see small bubbles rising from the bottom coil. This confirms the liquid is wicking. The device is now ready to fire safely.
Flashing lights confuse many users. These error codes translate directly into actionable next steps. You must read these signals correctly to protect your hardware.
Manufacturers use specific blink sequences to communicate internal errors. We compiled this diagnostic chart for quick reference.
LED Signal Sequence | Diagnostic Meaning | Actionable Solution |
|---|---|---|
3 Rapid Blinks | Short-circuit error. Usually caused by an overtightened cartridge deforming the internal electrodes. | Loosen the tank by a quarter-turn. Inspect the threads for metallic debris. |
2 Blinks / 10-Second Flash | Overload protection. The device hit its maximum continuous draw limit safely. | Let the internal cell cool down. This prevents severe thermal degradation. |
5 or More Blinks | Low voltage warning or a completely dead power cell. | Recharge the unit immediately using standard low-output cables. |
Avoid using fast-charging power bricks completely. Laptop and smartphone chargers push too much electrical current. These vaporizers require low-amp inputs. Overpowering the unit fries the internal IC board instantly.
Observe the LED indicator during charging cycles. If it fails to light up entirely while plugged in, the internal circuitry has aged out. It may have also disconnected internally from a previous drop.
You need a reliable decision framework for upgrading hardware. Sometimes repairs waste valuable time and effort. Recognizing terminal failure saves you profound frustration.
Certain symptoms mean you must throw the unit away. Watch out for these critical failure signs.
The unit loses charge immediately after you unplug it. This indicates severe lithium-ion cell degradation.
The device feels physically hot to the touch while sitting idle. This means an internal short circuit exists. Discard it immediately for your safety.
The center pin grommet is fully detached. This exposes the internal wires and creates an active fire hazard.
Match your power capacity to your actual usage habits. Casual users should target 300 to 600 mAh devices. Heavy concentrate users absolutely need 800+ mAh models to sustain all-day performance.
Evaluate your desired feature sets carefully. Upgrading to a concealed cartridge design prevents future drop damage. Investing in variable voltage options prevents burnt coils on expensive live resin tanks. You usually want a range between 2.0v and 4.0v for maximum flavor flexibility.
The core philosophy of vaporizer maintenance remains straightforward. Keep your threads immaculately clean. Avoid overtightening your cartridges under any circumstances. Always adopt the "sip it, don't rip it" approach during sessions. This methodology protects both your pneumatic sensors and your delicate heating coils.
Now you must take action. Try the isolation test first. If the paperclip fix fails to restore vapor production, your internal circuitry is likely compromised. Review your warranty options immediately. Most respected brands offer six to twelve months of coverage for manufacturing defects. Otherwise, evaluate a modern preheat or auto-draw replacement based strictly on your specific airflow requirements.
A: The voltage is too high for your oil viscosity, or the oil is too cold to wick. Lower the battery to 2.0v-3.2v and utilize a preheat cycle.
A: No. High-speed phone or laptop chargers can push too many amps, causing short circuits. Use standard, low-output USB ports (like a computer or a dedicated vape wall adapter).
A: Store upright at room temperature. Extreme heat degrades the lithium-ion cell, and leaving it sideways causes oil to leak into the battery's contact pins, destroying auto-draw sensors.


