
Views: 0 Author: Site Editor Publish Time: 2025-10-30 Origin: Site


Ever wondered how to fill an empty vape without making a mess? Properly filling your vape is crucial for a seamless vaping experience. In this post, you'll learn the basics of vaping and the importance of correctly filling your device. We'll guide you through understanding different vape types and the tools needed for a smooth refill process.
When it comes to filling an empty vape, knowing your vape type is crucial. Different designs require different filling methods and tools. Here’s a breakdown of the three common vape types: Top-Fill Vaporizers, Bottom-Fill Vaporizers, and 510 Cartridges.
Top-fill vaporizers are designed for easy refilling from the top part of the tank. You usually unscrew the mouthpiece or top cap to access the fill ports. This design helps reduce spills and makes refilling quicker. The coil is often located inside the tank, and you’ll need to prep it by adding a few drops of e-liquid directly onto the cotton holes before filling the tank to ensure proper saturation.
Advantages of top-fill vapes include:
Less mess during refilling
Easy to monitor e-liquid levels
Convenient coil replacement
They are popular among both beginners and experienced users because of their user-friendly design.
Bottom-fill vaporizers require you to access the tank from the bottom. To fill, you usually unscrew the base to remove the coil, fill the tank, then reassemble. This type often involves removing the coil first, then saturating it with a drop or two of e-liquid to avoid dry hits.
Key points about bottom-fill vapes:
Slightly more involved filling process
Coil removal needed for refilling
Often more customizable in terms of coil options
Users who prefer more control over their device’s components often opt for bottom-fill models.
510 cartridges are small, portable, and widely used with vape pens. They feature a standardized 510-thread connection, making them compatible with many batteries. Filling these cartridges usually involves unscrewing the mouthpiece, using a syringe or dropper to add e-liquid or oil around the coil area, then reassembling.
Important features of 510 cartridges:
Compact and easy to carry
Simple filling process with syringe or dropper
Compatible with a broad range of batteries
They are especially favored by users looking for convenience and portability. Always identify your vape type before filling to select the right method and tools, ensuring a mess-free and efficient refill process.
Knowing the right tools for filling your vape is essential. Each vape type needs specific equipment to ensure a smooth refill process without leaks or damage. Let’s break down what you’ll need for top-fill vaporizers, bottom-fill vaporizers, and 510 cartridges.
Top-fill vapes are popular for their easy refill design, but having the right tools makes the process even easier:
E-liquid bottle with a fine dropper tip: Helps direct liquid precisely into the fill ports without spilling.
Small screwdriver or coin: Some top caps might be secured tightly; these help unscrew them safely.
Paper towels or cloth: For quick cleanup of any accidental drips.
Tweezers (optional): Useful for handling coils or small parts during disassembly.
Gloves (optional): Keeps hands clean and prevents contamination of e-liquid.
Using a dropper with a narrow tip is key. It allows you to fill the tank carefully, avoiding the central airflow tube. Also, having a clean workspace with towels helps catch any spills immediately.
Bottom-fill vapes require more disassembly, so you’ll need tools that help with that:
E-liquid bottle with a narrow dropper: For precise filling inside the tank.
Small adjustable wrench or pliers: Sometimes the base can be tough to unscrew.
Screwdriver set: Some models have screws securing the base or coil.
Cotton swabs: Great for cleaning the tank or wiping excess liquid.
Gloves: To maintain hygiene and avoid sticky fingers.
Since you remove the coil before filling, having tweezers or a coil tool can help manage the coil carefully. Be gentle to avoid damaging the coil or threads during reassembly.
510 cartridges are compact and refillable with the right accessories:
Syringe with blunt needle or fine dropper: The syringe offers precision filling, especially for thick oils.
Gloves: Essential to keep oils clean and avoid skin contact.
Small container or tray: To hold cartridge parts safely during disassembly.
Warm water bath (optional): To gently warm thick oils before filling, making them easier to handle.
Paper towels: For cleaning spills or wiping cartridge parts.
A syringe is often preferred for 510 cartridges because it minimizes spills and allows for controlled filling. Make sure you fill slowly to avoid air bubbles or leaks. Always prepare your workspace with all necessary tools before starting to fill your vape; this minimizes mistakes and keeps the process clean and efficient.
Filling a top-fill vaporizer is straightforward when you follow the right steps. Here's how to do it properly, ensuring your vape works well and tastes great.
Start by unscrewing the airflow base at the bottom of the vaporizer. This allows you to pull out the coil carefully. Leave the tank, top connector, and mouthpiece attached for now. If you want to switch flavors, clean the tank before refilling to avoid mixing tastes.
Coil preparation is key to a smooth vaping experience. Hold the coil horizontally between your thumb and pointer finger. Using the dropper from your e-liquid bottle, put one drop of e-liquid onto each cotton hole in the coil. Most coils have about six holes. This step saturates the cotton, preventing dry hits and extending coil life.
Next, unscrew the top connector from the tank. This reveals the fill ports where you add your e-liquid. Hold the dropper tip against the inside of the tank and slowly fill until the liquid reaches the indicated fill line. Avoid getting e-liquid into the center tube, which is the airway. Liquid in the airway can cause unpleasant inhaling of liquid instead of vapor.
Once the tank is filled, screw the top connector and mouthpiece back on securely. Then, insert the coil back into place and screw the airflow base back on. Make sure all parts are tight but don’t overtighten, as this can damage the threads.
After reassembling, wait 2 to 3 minutes before vaping. This pause lets the coil fully absorb the e-liquid, avoiding dry hits and ensuring smooth vapor production. Once the wait is over, your top-fill vaporizer is ready to provide a satisfying vape. Always hold the coil horizontally while applying e-liquid drops to ensure even saturation and prevent damage during coil preparation.
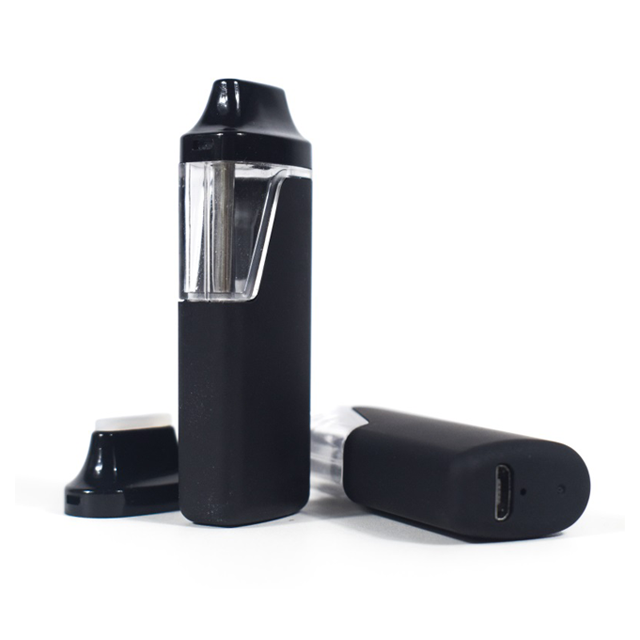
Filling a bottom-fill vaporizer involves a few more steps than a top-fill model, but it’s straightforward once you know the process. This guide will walk you through each step to help you refill your vape safely and efficiently.
Start by unscrewing the bottom metal piece of your vaporizer. Set it aside carefully, as you’ll need it later. Once the base is off, gently slide the coil out from inside the tank. If you plan to switch flavors, now is a good time to clean the tank to avoid mixing tastes. Handle the coil with care to avoid damaging the delicate cotton inside.
Before refilling, saturate the coil to prevent dry hits and extend its life. Hold the coil horizontally and use the dropper from your e-liquid bottle to place 1 or 2 drops of e-liquid directly onto the cotton holes of the coil. These holes absorb the liquid, so make sure they are well-moistened but not flooded. This step ensures the coil is ready to vaporize the liquid properly.
With the coil out and prepared, fill the tank through the opening you accessed by removing the base. Hold the dropper tip against the inside of the tank and slowly add e-liquid. Fill until the liquid reaches the max fill line marked on the tank. Avoid getting e-liquid into the central airflow tube, as this can cause leaking or gurgling when you vape. Fill carefully to prevent spills.
After filling, slide the coil back into its place inside the tank. Screw the bottom metal piece back onto the vaporizer securely but avoid overtightening, which can damage threads. Make sure all parts fit snugly to prevent leaks. Your vaporizer should now be fully assembled and ready for the next step.
Once reassembled, wait 2 to 3 minutes before using your vaporizer. This pause allows the coil to soak up the e-liquid thoroughly, preventing dry hits and ensuring smooth vapor production. After waiting, your bottom-fill vaporizer is ready to deliver a satisfying vaping experience. Always saturate the coil with a few drops of e-liquid before filling the tank to protect the coil and enhance vapor quality.
Filling a 510 cartridge might seem tricky at first, but with the right steps, it’s easy and mess-free. These cartridges are popular for their portability and compatibility with many vape batteries. Follow this detailed guide to fill your 510 cartridge correctly and enjoy a smooth vaping session.
Before you start, gather everything you need:
Your empty 510 cartridge
E-liquid or oil suited for your cartridge
A syringe with a blunt needle or a fine-tipped dropper for precise filling
Gloves to keep things clean
A small container or tray to hold parts during disassembly
Paper towels for any spills
Optional: warm water bath to gently warm thick oils
Warming thick oils makes them easier to fill, so place your oil bottle in warm water for a few minutes if it feels too thick.
Start by carefully unscrewing the mouthpiece from the cartridge. Twist it counterclockwise until it comes off. Keep the mouthpiece in a safe place to avoid losing it. Some cartridges may require multiple turns. If the mouthpiece won’t budge, your cartridge might not be refillable.
Check the coil inside the cartridge; it should be snugly attached to the base. A loose coil can cause leaks or poor vapor production.
Fill your syringe or dropper with the e-liquid or oil. Insert the tip carefully into the cartridge, avoiding the central airflow tube to prevent leaks or gurgling. Slowly press the plunger to fill the cartridge just below the top or max fill line. Filling too much can cause spills or leaks.
Take your time to avoid air bubbles. If bubbles appear, gently tap the cartridge or let it sit upright for a moment to help them rise and disappear.
Once filled, screw the mouthpiece back onto the cartridge. Make sure it’s snug but don’t overtighten, which can damage the threads or crack the cartridge. Check for any leaks by inspecting the cartridge carefully.
If you notice leaks, disassemble and reassemble the cartridge to ensure all parts fit tightly.
Priming helps the coil absorb the e-liquid for better vapor quality. Let the filled cartridge sit upright for a few minutes. Then, take a few dry puffs without attaching it to the battery. This action pulls the liquid into the coil, preventing dry hits and extending coil life.
Finally, screw the cartridge onto your 510-threaded battery. Ensure it’s securely attached but avoid overtightening. If your battery has adjustable settings, start at a low voltage or wattage and increase gradually until you find the ideal vapor production and flavor.
Overfilling your vape tank or cartridge can cause leaks, messy spills, and poor performance. Always fill only up to the indicated fill line or just below the top edge. This leaves enough room for air and prevents liquid from flooding the airway or coil area. Filling slowly helps control the amount and reduces the risk of overflow.
Before you start vaping, make sure the coil is fully saturated with e-liquid. Dry coils cause harsh hits and can burn out quickly. Apply a few drops of e-liquid directly onto the cotton holes in the coil before filling the tank or cartridge. After filling and reassembling, wait 2 to 3 minutes to let the liquid soak in completely. This step extends coil life and improves flavor.
Leaks can ruin your vape experience and waste e-liquid. After filling and reassembling, inspect your device carefully. Look for any liquid around the base, mouthpiece, or seams. If you notice leaks, disassemble and reassemble the parts to ensure a tight fit. Using the right tools and handling parts gently also helps prevent damage that causes leaks.
The quality of your e-liquid affects flavor, vapor production, and coil lifespan. Always choose high-quality e-liquids or oils from reputable brands. Poor-quality liquids may contain impurities that clog coils or damage your device. Premium e-liquids also offer consistent viscosity, making filling easier and reducing leaks. Always fill your vape slowly and stop at the fill line to prevent leaks and ensure optimal coil performance.
Filling an empty vape involves knowing your vape type and using the right tools for a mess-free process. Whether you're working with top-fill, bottom-fill vaporizers, or 510 cartridges, following the correct steps ensures efficient refilling. Always saturate the coil properly and check for leaks to enhance your vaping experience. Using high-quality e-liquids is crucial for optimal performance. For premium vaping products, iPlay offers innovative solutions that deliver excellent value and satisfaction.
A: An empty vape refers to a vaporizer device that needs refilling with e-liquid or oil. Understanding your vape type is essential for proper refilling.
A: To fill an empty vape, identify your vape type (top-fill, bottom-fill, or 510 cartridge) and follow the specific refilling steps for that type to ensure a mess-free process.
A: Leaks in an empty vape can occur due to overfilling or improper reassembly. Ensure all parts are tightly secured and avoid overfilling beyond the fill line.
A: Essential tools for filling an empty vape include a fine dropper or syringe, gloves, and paper towels. Specific tools may vary based on your vape type.


